Basic ArcGIS for the amnesia-stricken student

As I’ve been moving through my Ph.D, the use of GIS systems has become increasingly important to process the data I have been collecting or have been given. Unfortunately for myself, it has been a while since I had to use GIS tools to their full effect with my undergraduate degree teaching me very briefly how to create a polygon in ArcGIS in my first and second year. That was 4 years ago. Since then I have barely used ArcGIS, and thus have forgotten the basics. In my frustration I turned to Google, that all-knowing tool of wisdom, to help me through my state of amnesia but was left feeling more frustrated than when I started. The lack of illustrated guides became apparent, even on Youtube, as I sifted through the seemingly endless buttons and sub-menus that ArcGIS had to offer.

So, to save time for others who may have indeed forgotten how to create a polygon, I have put together a short guide on how to not only create a polygon, but also how to cut or clip the data within that polygon. Ideally at this point you will know how to import your basemap and/or generate a difference map (Search for Map Algebra for generating difference maps, you literally subtract one map from the other). If not, let me know, and I can direct you to an appropriate guide or even write another illustrated guide myself.

How to draw polygons in ArcMap

  • In Arc Catalog, select an appropriate folder in which to work. Make sure the basemap or difference map and the polygon are in the same folder.
  • Right click on your chosen work folder and select “New > Shapefile > Polygon” and give it a sensible name (Below).

NewShapeFile

CreateNewShapeFile


  • Open the Editor toolbar if it is not already open and click “Start Editing”. On the right-hand side of the Editor toolbar is a “Create Features” button (Below).

CreateFeatures

  • When you click it, it opens a window that allows you to select the feature you wish to draw onto your map (Below).

CreatingPolygon


  • Then it is simply a case of tracing the outer edge of the feature you wish to retain. In this case, a turbidity current event on a difference map. Once you are done, double click to finish the polygon. The edge of the polygon will turn blue to indicate that this was successful.


FinishPolygon


  • Now to clip the data so that you’re left with the turbidity current event, and not the whole difference map. In Arc Toolbox you need to find Datamanagement Tools > Raster > Raster Processing > Clip (Below).


DataClip


  • In this menu you will have to select the input raster (the difference map or base map that you’re using) and the output extent, which is the polygon you just created. Check the “Use Input Features for Clipping Geometry” and “Maintain Clipping Extent” boxes and click “Ok”.

ClipMenu


  • Once this is done, you will be left with the clipped difference/base map which you can export as a TIFF for use in Matlab, or carry on working on in ArcGIS. Good job!


CompletedClip

If you have any questions at all, please do not hesitate to leave a comment or conact me.

Ph.D First Year: A Summary

This first year has been full of lessons, both academic and personal, good and bad, as well as exciting connections that could potentially prove to be life-changing.

11145193_10153537790173418_1417322026877934925_o            11537708_730243407098947_1653170667262502708_n            10559772_730243327098955_6758127782281991262_n

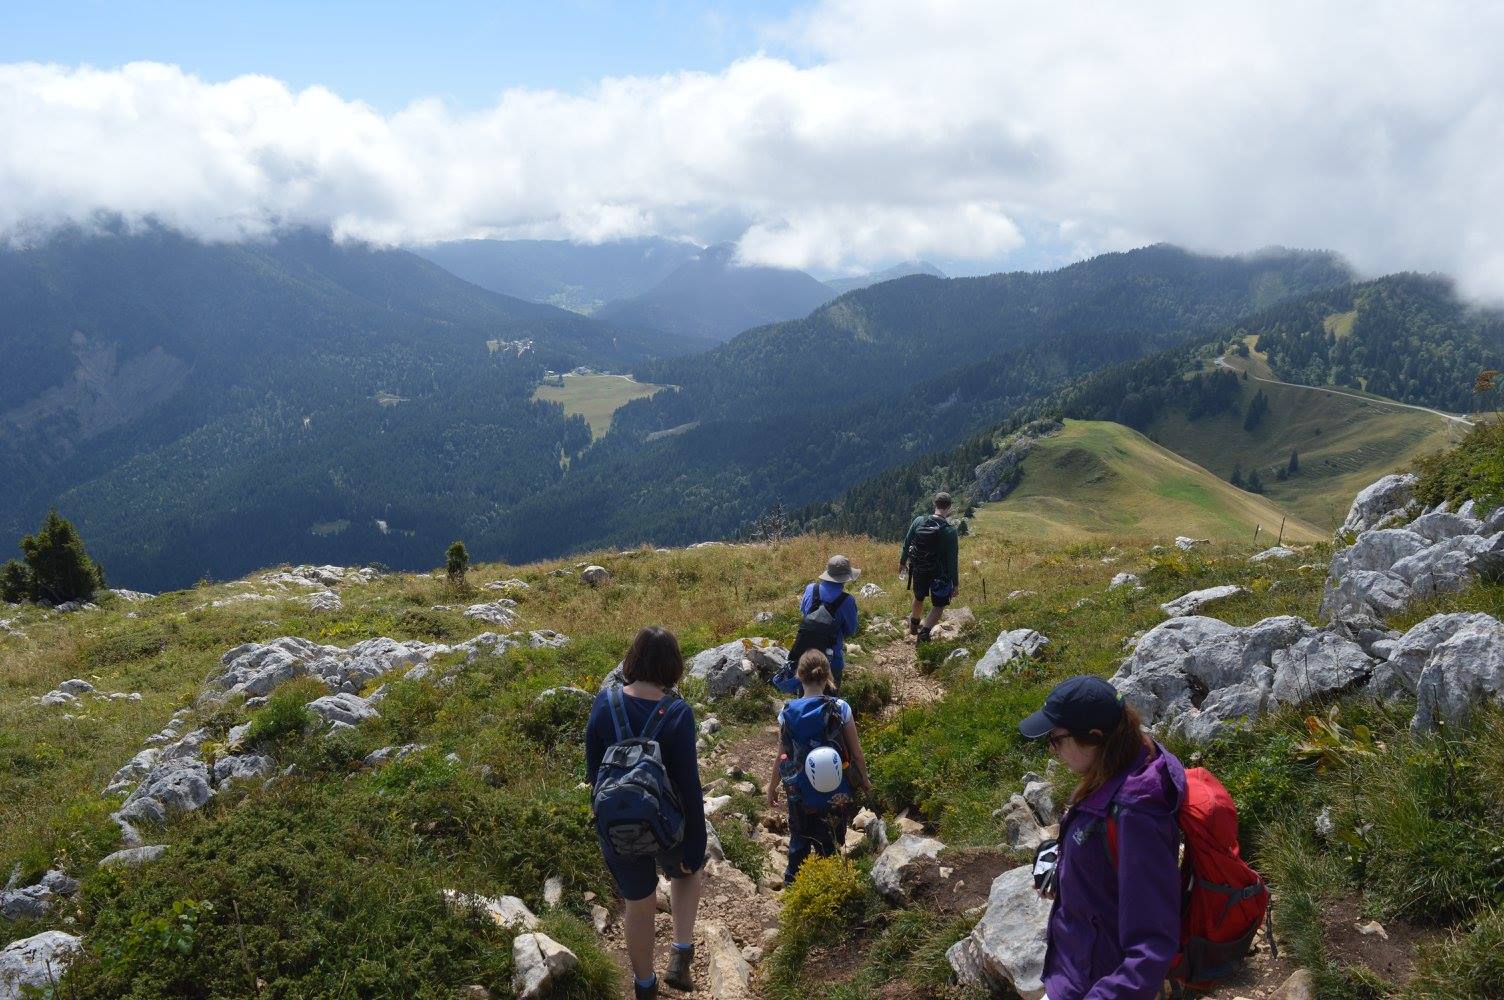
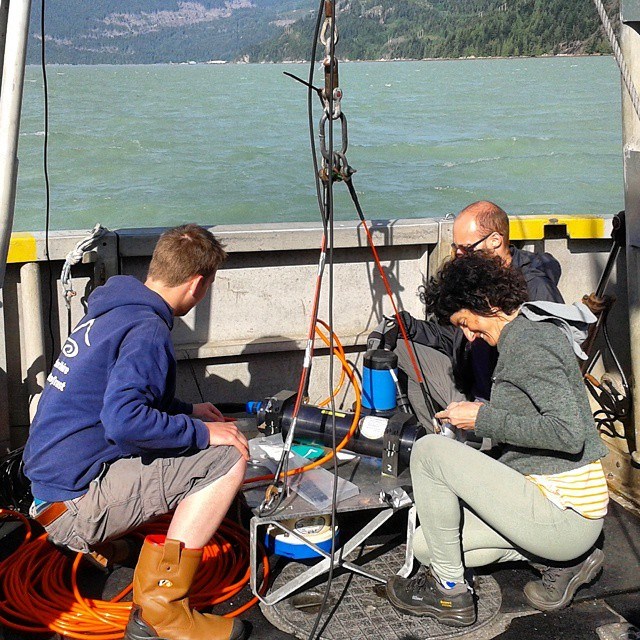
During my first year I’ve been lucky enough to have been all over the world. I’ve been to Canada, France, Austria, Holland, Belgium, America and all around the UK with my host institution and the CDT which I am a part of. Through my supervisors and my university I have learned how to jump into the sea from an 8 m high platform, how to program and deploy acoustic equipment from a ship, and how to program effectively using Matlab (almost), to name a few things. Through the CDT I have learned more about geology in a year than I ever have before, particularly along the Yorkshire coast and in the French Alps. With thanks to both the CDT and my supervisors, I have met people from across the globe in academia, members of the Scottish, English and Dutch governments, and people from all levels within industry and I feel I am really beginning to understand how important science is for the past, present and future of the world. The good times are great, but it’s the darker times which take a little bit (or a lot) of grit and support to get through. I’ve listed, in no particular order, some examples that I can think of and how I got through them.

Supervisor feedback is not to be taken negatively. I brought up at my panel meeting that I felt feedback could be a little harsh at times, my supervisor made an excellent retort; feedback is a part of professional development. It is there for you to use and to help you to build upon your own work. Your supervisors (should) want you to succeed, they want you to make it to the end of your Ph.D. They wouldn’t take you on as their student otherwise. They seemed to take my feelings on board and they are trying to come across as less harsh in their feedback, although it still stands to reason that it is there for your own benefit.

Feedback from one supervisor will contradict that of another. Another reason why I wasn’t terribly fond of feedback. This will happen and it may leave you feeling conflicted over whose advice to follow. You have to remember that it is your work. Feedback is on par with advice, you can take it or leave it. Whether it will be accepted and published is another story, but this is also the ultimate aim of your supervisor – to see you become a publishing, contributing member of the scientific community. You have to use your best judgement over which advice to take and which to leave.

Progress, no matter how small, is still progress. Some days I have left the office and felt that I didn’t make a whole lot of progress. This feeling can last a few days, or a few weeks. I have heard this from a few colleagues too. The method I found that helps me to combat slow periods is keeping a log of all the progress I make in a day so that I can physically see, in writing, what I have done. Other people report that setting small targets is another good way to ensure you make some progress during a day. Simply put, track your progress so you can see what you’re doing and where you’re going. Hopefully this will stave off a full-blown episode of Second Year Blues, but if not, there are also methods out there to get you through these dark times.

Working at home is fine, as long as you spend a few days a week in the office. One of the first things I did when I started last year was buy a new PC for my home to make sure I had the option to work at home for if the office was distracting. To start with I spent a lot of time working from home and it turned me into a bit of a recluse. After a while you begin to learn how important inter-personal interaction is. Most people have seen The Shining, cabin fever is no joke. You learn to manage the distractions and you settle in after a while. Hopefully.

A Ph.D can feel like a lonely experience at times. It is generally considered a self-motivated exercise, it’s all your own work and quite often the analysis you need to do is specific to your project. Trying to piece together bits of information from various sources both online and offline can be tough and there aren’t always people around to help you, which can leave you feeling isolated. All you can do is book frequent meetings with your supervisor (if you can), they’re there to supervise you after all. Do your best to get through it, and you will eventually get through it.

If you find yourself struggling write, study journal articles and check the internet. Coming up with questions that you want to ask of your data and a hypothesis for you to test is the best starting point, it is the basis for your work and helps you to structure not only your essay, but also your reading. If you’re lucky enough to be given data, have a play around with it first to get a feel for it, then when you’re ready have a think about some questions or hypotheses to help start you off on your writing. Writing a good question and hypothesis takes a bit of practice, but with some helpful guides on the internet you can be well on your way to producing some solid questions and hypotheses for your work. Perhaps a bit of a cheat, and I’m not really sure how prolific of an issue this is… I find that I can sometimes struggle with essay structure, and still sort of struggle with it. A thing I started doing during undergrad is to look at the structure of published journal articles. Really pay attention to the message each paragraph is trying to put across and adapt that for your own purpose. They were published for a reason, if you can pick out the purpose of each section and apply it to your own work, you’re onto a winner.

People around you know things that you don’t. This point comes back to my Imposter syndrome post where it is something of a pitfall to compare your work or your level of knowledge to that of someone else. You aren’t going to produce the same work as someone else, and you aren’t going to know the same things as someone else. Unwarranted personal comparisons seem to be rife in the Ph.D world, and they really shouldn’t be. Everyone is a budding scientist and everyone will forge their own path through to their viva. It is still an easy trap to fall into however, one I stumble into occasionally, and a good one to be aware of for when the comparisons start to flit through your mind.

All in all, a Ph.D is a great time, and a time full of things from which to learn. You will grow personally and professionally into a budding scientist on their way to change the world for the better! You just have to keep going and use the support you have around you, be it friends or professional services that are there to lend you an ear when things are getting to you.

Drills ‘n’ flows

So what have I been up to since my last post?

Quite a lot!

I have learned how to drill holes into thick plastic, and I’ve been writing a paper for the Research Horizons assignment. I have to write a 2000 word critique essay on a topic of my choice, I chose supercritical bedforms. The title for my paper is ‘A super critical paper’ ha… ha ha… Anyway.

Drilling

You might have laughed at the drilling part, but it’s not as simple as it sounds! To start with you need to drill a ‘pilot hole’ into the plastic, from one side to the other. If all goes well you’ll succeed in this and make it to the other side without a hitch, but if not your drill bit will get stuck and could snap in the hole which you drilled! As you can imagine, once the bit snaps it can be difficult to get back out.

20141201_155000 20141202_123614

My technique clearly needs some work, but it’s good to be aware of the process right? Once your pilot hole is drilled you can then drill the hole to your desired size. The reason for the pilot hole is so that the other side of the plastic doesn’t experience a ‘blow out’ at the other side where the drill bit literally blows a hole out of the other side, causing an untidy exit wound in the plastic. It also serves as a guide for when you drill the real burrow into the plastic so the drill doesn’t move around. Not exactly the most exciting thing to learn, but it didn’t strike me as obvious at the time. Many thanks to Kelvin for teaching me this.

Antidunes vs. Cyclic Steps

Now, the difference between antidunes and cyclic steps. This is something that is obvious if you observe the characteristics of each of these bedforms (bedforms are things like ripples and dunes like you would find on a beach or in the desert).

figure_16fig01

On the left we have cyclic steps and on the right we have antidunes. Now, you might be thinking “of course they’re different, they even look different!” and you’re right! Reading about these phenomena and seeing them are very different ways of learning, and the visualisation allows you to really see the difference between them. This shows that I still have much to learn throughout my Ph.D!

Antidunes are a bit like dunes – they are little (or large) bumps on the surface of sand and are formed by the erosion and deposition of sand. The difference between dunes and antidunes is that except instead of moving with the flow like dunes, antidunes move against the flow, upstream. Defiant things aren’t they?

Antidunes are formed when the pressure (or inertial) forces acting on the sandy water are greater than that of gravity (a downward force with a maximum (terminal) velocity of 9.81 meters per second) which move the sand down the slope. This is also referred to as supercritical flow, whereby the Froude number of the flow is greater than 1.25. This type of flow is thin and fast, and can have a standing wave at the surface.

20140909_151851(1)

If you aren’t sure if you’ve seen antidunes or supercritical flow before, if you have been to a beach before you probably have! The little ripples you see on the water when the tide has gone out and the water is draining across the surface of the sand – they are antidunes! These can appear in all sizes depending on the size of the flow.

The cyclic steps I showed above are the ones observed on Mars (crazy right?) using NASAs Shallow Radar (SHARAD) instrument on the Mars Reconnaissance Orbiter. More details can be found here. Cyclic steps are also found here on earth where material flow undergoes a series of changes in its flow regime (whether the flow is supercritical or subcritical). They are a pretty newly discovered type of bedform, at least in an under water sense.

Under water cyclic steps  have been talked about a lot recently in the scientific community because there are some identification issues associated with them because they are under water.

Cyclic steps, are similar to antidunes because they move against the flow of water, upstream. Unlike antidunes, they are both bigger and asymmetrical. They are called ‘cyclic steps’ because they cycle between supercritical and subcritical flow, known as hydraulic jumps.

I think that’ll do for now, there’s a lot of technical information here. If you would like any further explanation feel free to contact me.